Form Builder guide
How to use the Form Builder?
Summary: Master the form builder to create custom forms that capture prospect information and automatically populate your sales pipeline.
Overview
The form builder is your tool for creating customized lead capture forms without writing code. Build forms with drag-and-drop simplicity, add fields tailored to your needs, configure validation rules, and design forms that match your brand. This comprehensive guide teaches you everything needed to create effective forms.
Prerequisites
- Active growlio account with form access
- Member-level permissions or higher
- Understanding of what information you want to collect
- Basic knowledge of form design principles
How to Use the Form Builder
Step 1: Access Form Builder
Navigate to Business > Forms, then click "Create New Form". The form builder interface opens with a blank canvas and field palette.

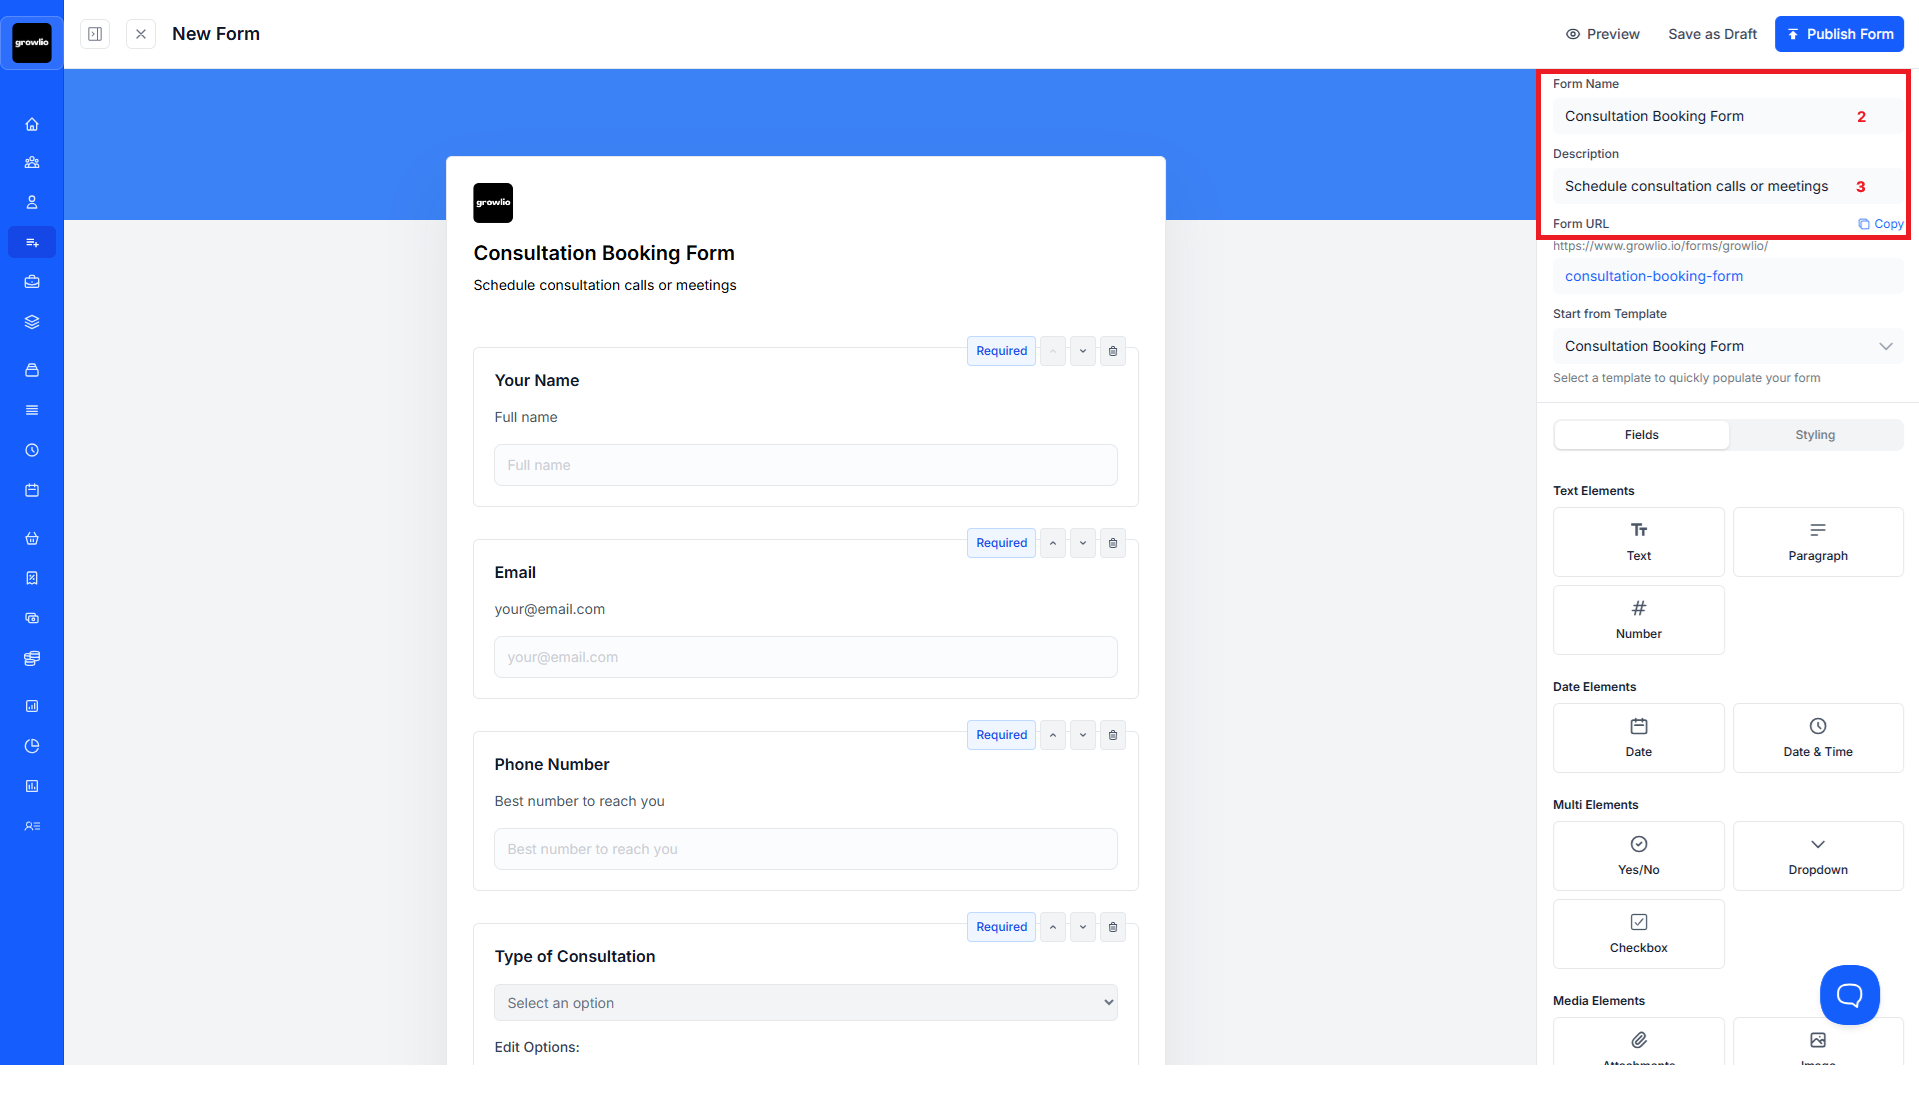
Step 2: Name Your Form
Give your form a clear, descriptive name that indicates its purpose (e.g., "Website Contact Form", "Quote Request Form", "Newsletter Signup").
Tip: Use names that help you identify forms quickly when viewing analytics or managing multiple forms.
Step 3: Add Form Title and Description
Set the form title that appears to users and add a brief description explaining what the form is for. This helps conversion rates by setting expectations.
Step 4: Drag Fields from Palette
Browse available field types in the left panel: text input, email, phone, dropdown, radio buttons, checkboxes, text area, and more. Drag fields onto your form canvas.

Tip: Start with essential fields (name, email) then add optional fields. Fewer fields typically increase form completion rates.
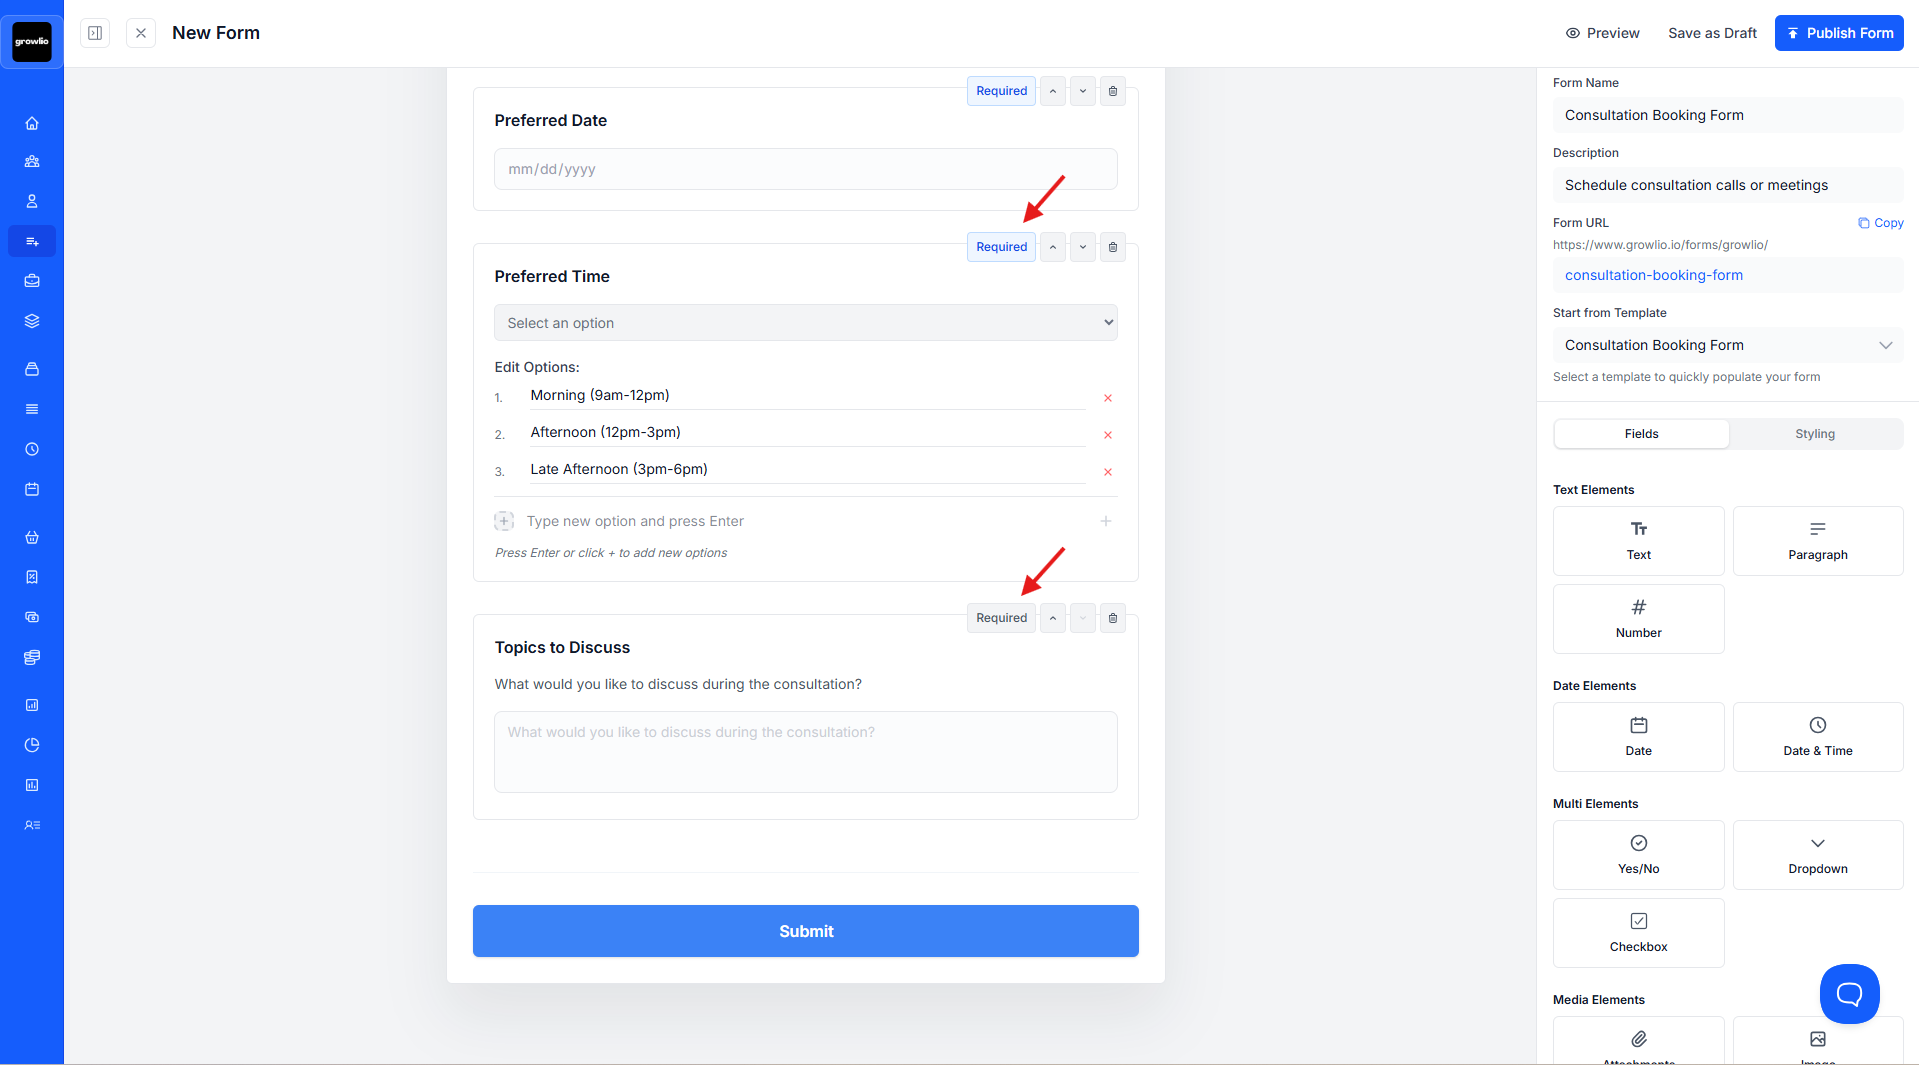
Step 5: Configure Field Properties
Click any field to open its properties panel. Set label text, placeholder text, validation rules, whether it's required, and help text.
Step 6: Add Custom Field Options
For dropdowns, radio buttons, and checkboxes, add specific options users can select. Each option can have a label and value for data organization.
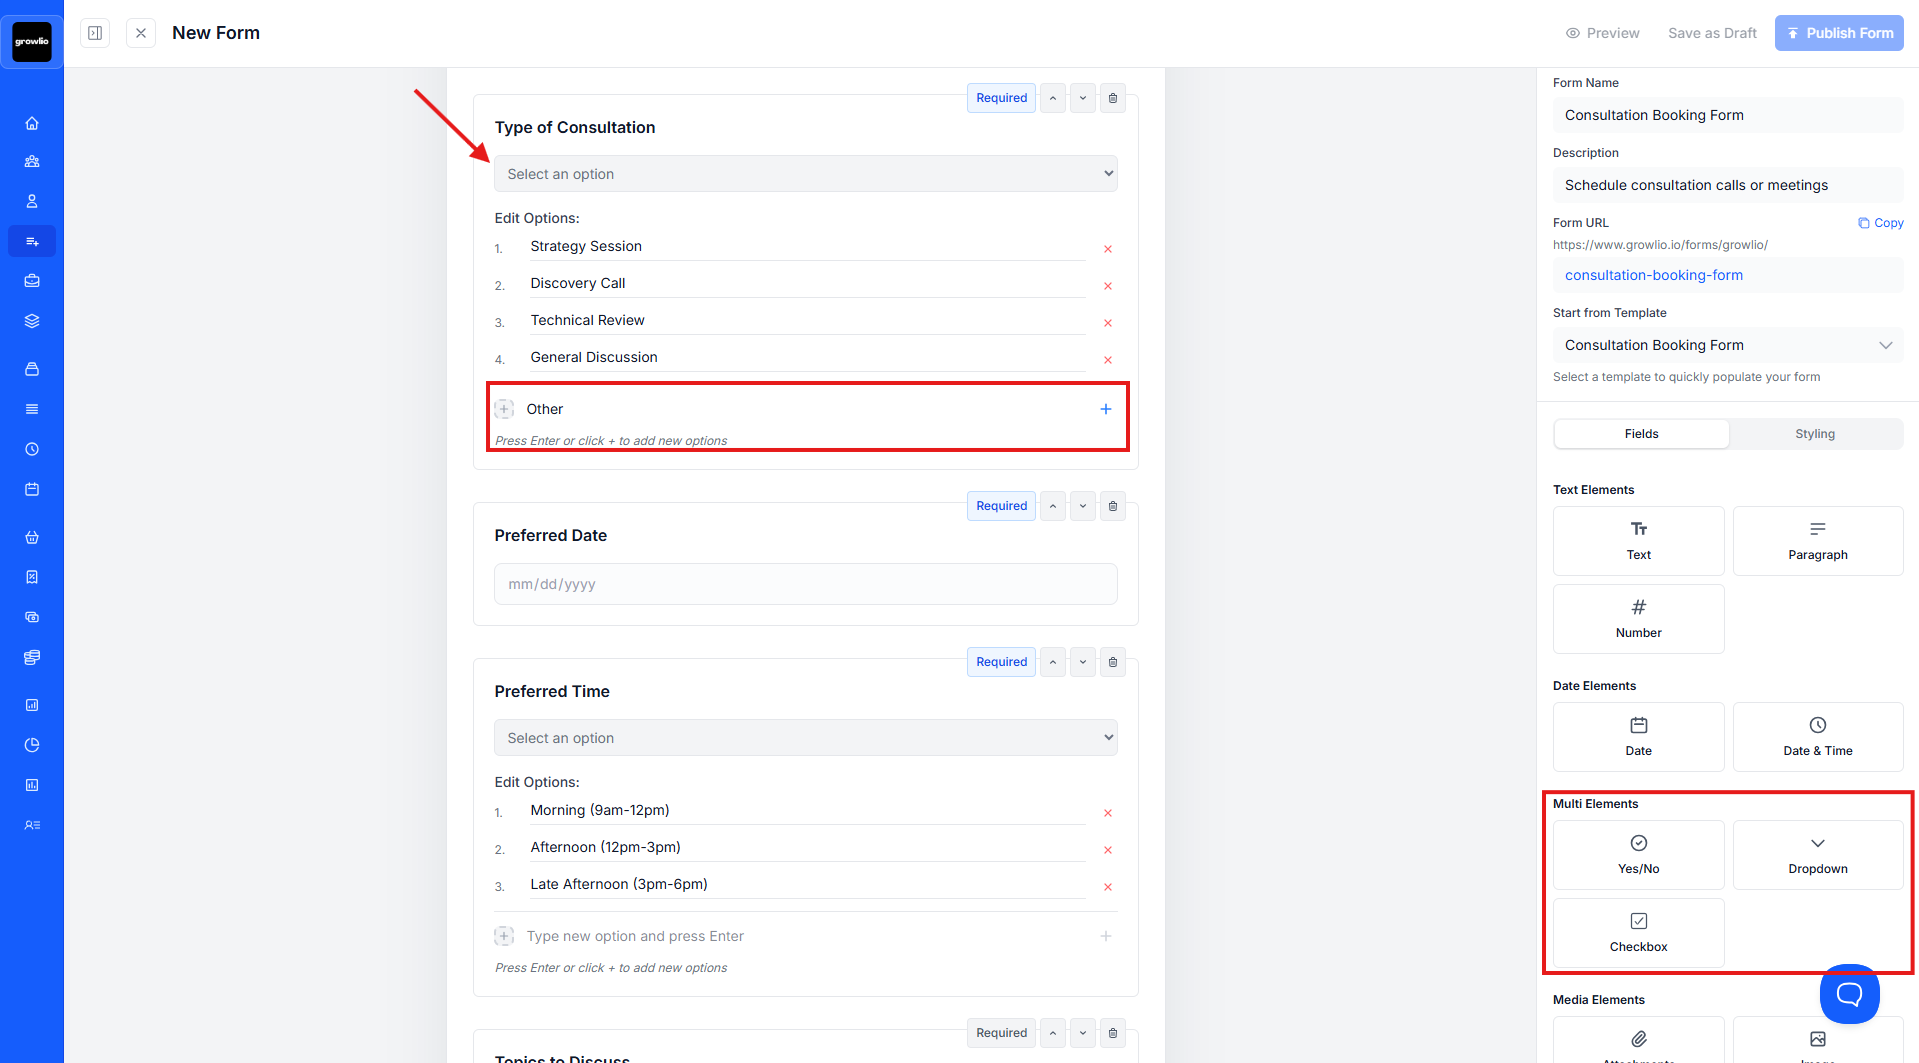
Tip: Keep dropdown lists concise (under 10 options). Use "Other" with text input for edge cases.
Step 7: Set Field Validation Rules
Configure validation for each field: required/optional, format (email, phone, URL), character limits, and custom validation messages.
Step 8: Preview Your Form
Use the preview function to see how your form looks on desktop, tablet, and mobile devices. Test the user experience and make adjustments.
Tip: Always preview on mobile - many users complete forms on smartphones.
Step 9: Save Form
Once satisfied with your form, click "Save" or "Publish" to make it available for use. You can edit forms anytime even after publishing.

Tips & Best Practices
- Keep forms as short as possible - only ask for information you truly need
- Use clear, concise labels that anyone can understand
- Provide helpful placeholder text showing example inputs
- Make only essential fields required to reduce friction
- Group related fields with section headers
- Use appropriate field types (dropdown vs radio, email vs text)
- Add helpful error messages that guide users to correct inputs
- Test forms on multiple devices before publishing
- Use conditional logic to show/hide fields based on previous answers
- Include privacy assurance near submission button
- Offer "Other" options in dropdowns for flexibility
- Auto-format phone numbers and other structured data
Troubleshooting
Issue: Can't drag fields onto form
Solution: Ensure you're dragging from the field palette to the form canvas area. Try refreshing the browser if drag-and-drop becomes unresponsive. Check that you haven't reached field limits for your plan.
Issue: Field validation not working
Solution: Verify validation rules are properly configured in field properties. Test with various inputs to identify the issue. Ensure required fields are marked correctly. Check that validation messages display properly.
Issue: Form layout breaks on mobile
Solution: Use the mobile preview to see how fields stack. Avoid forcing specific widths that don't scale. Test on actual mobile devices before final publishing. Consider using single-column layouts for mobile.
Issue: Changes aren't saving
Solution: Check your internet connection. Look for error messages indicating what's wrong. Try saving individual fields before saving the entire form. Clear browser cache if problems persist.
Issue: Can't find specific field type needed
Solution: Check if the field type is available in your plan tier. Use a similar field type and customize it. Contact support to request new field types. Consider using text input with validation for custom needs.